Installation
- Go to My Downloads to see your active subscriptions. Click on your active subscription and download all documents served with it.
- Remember that the package for 2.5 will work for that Joomla 2.5 only, and the package for 3.x will work for Joomla 3.x only.
- Using your Joomla installer, install the file named com_calendarplanner_X.X.X.zip (X.X.X stands for the version). This is the main component file for Calendar Planner.
- Using your Joomla installer, install the file named plg_calendarplanner_X.X.X.zip (X.X.X stands for the version). This is the main system plugin file for Calendar Planner.
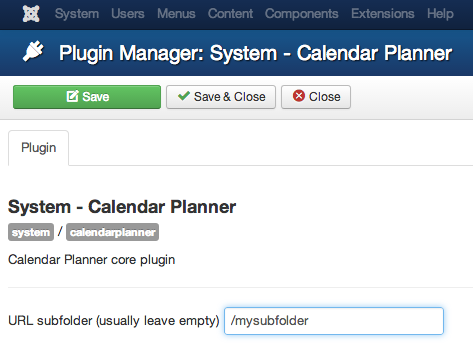
- If your website root is located in a subfolder of your main site URL, you will need to specify this subfolder's name in the Calendar Planner - System plugin options. Just open that plugin and fill out the field "URL subfolder". For instance, if your Joomla installation is located in www.mysite.com/mysubfolder, you will need to write "/mysubfolder" into this field:
- Go to plugin manager and open the System - Calendar Planner plugin. Configure its details and enable it, and hit save.
- Go to your Components section and click on Calendar Planner. Click on the Options button (on the top right corner) to adjust basic configuration information, such as default week starting day or permissions.
- Go to your menu manager and create a new item of type Calendar Planner > Week (for example) to let your frontend users access the Calendar Planner on the frontend.
Installing the Alerts notification plugin
- Download the Alerts plugin on My Downloads
- Install it using the Joomla installer
- Go to plugin manager and open the System - Calendar Planner - Alerts plugin. Configure its details and enable it, and hit save.
What next?
Are you done with the installation process? Then move on to our help article Getting Started