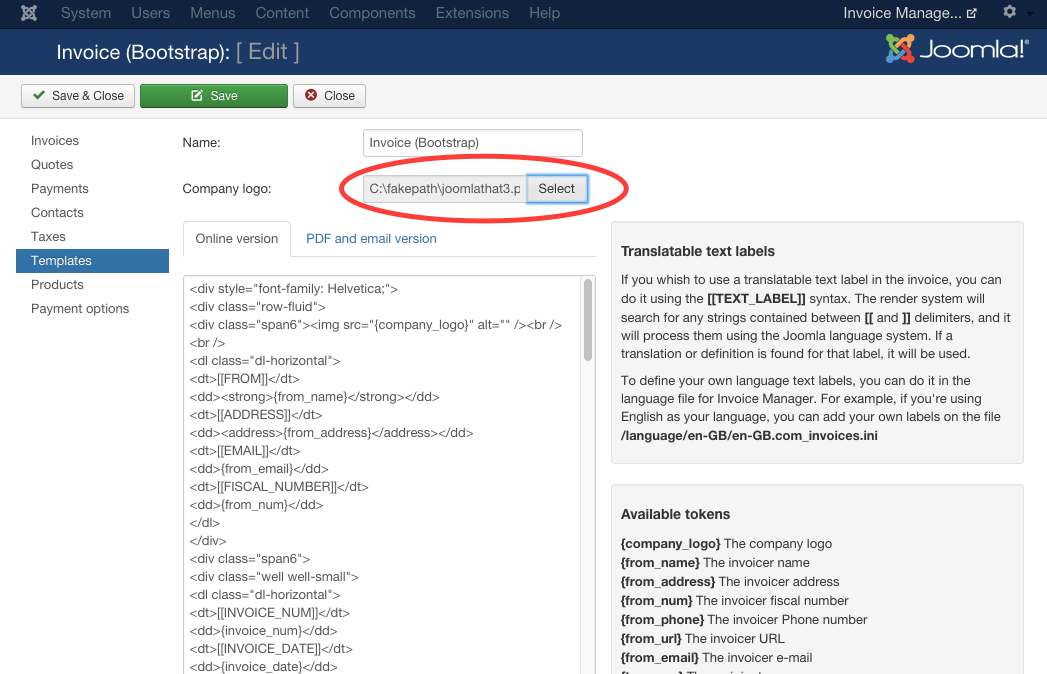
Setting the template logo
This article will explain how to set a custom logo for the invoices.
To set the your logo follow these steps:
- Create an image with your logo. The format must be png, jpg, jpeg or gif. The recommended width is arround 412px.
- Once you have your logo ready, go to Invoice Manager -> Templates and edit the template in which you want to set the logo.
- Select the image of your computer as shown in the image.

- Note that you can select the logo using both plain text editor and HTML editor.
- Once the new logo is selected, you can save the template and the image will appear in your invoices.
The {company_logo} token
There are some things that you need to consider to customize the logo inside your template.
The {company_logo} token isn't the complete image. It is the link of the image in your server. So, to customize the image you need to use the plain text editor and be familiared with HTML.
The token must be used inside an img tag: <img src="/{company_logo}" alt="" />. Always inside the src attribute and between double quotes. It is made like this because some people may want to add extra attributes and information to the img tag.